* If you want to use the PST Manager of WEXAL® Page Speed Technology (hereinafter referred to as "PST"), please update your PST version to 3.0 or higher and update all profiles to the latest version.
Getting Started with PST Manager
Refer to the following;
Procedures for Getting Started in PST Manager (First Steps)
PST Manager Functions
Refer to the following;
PST Manager Pages
Dashboard
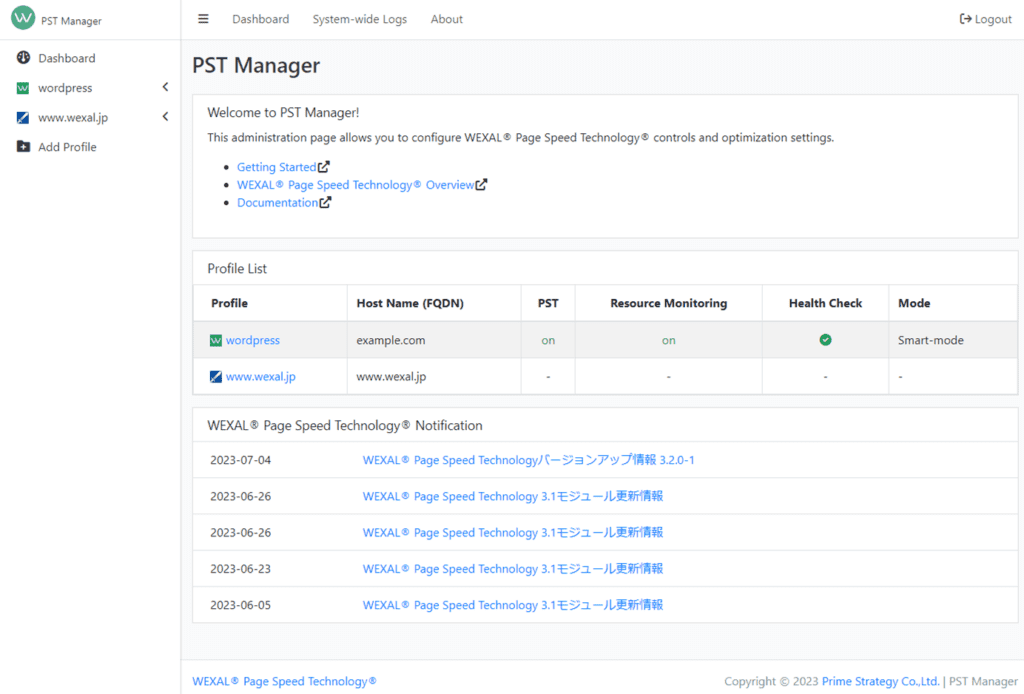
This page is a dashboard to all profiles. The following information is available for using PST Manager.
- PST Manual
- Profile List
- For profiles without PST initialization, only the profile and host name (FQDN) are shown.
- Update information on PST (modules, latest news)
Basic Configuration (pane menu)
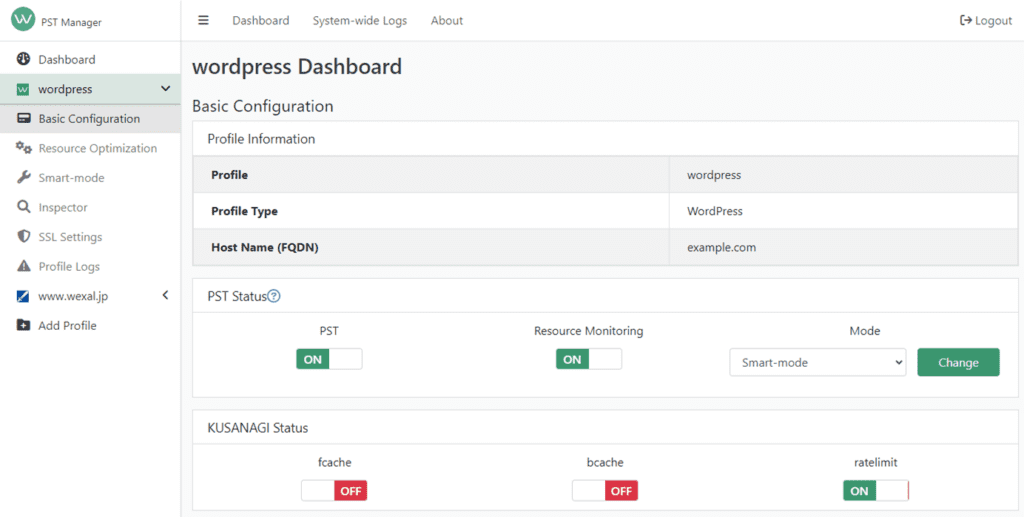
The following operations can be done on the selected profile.
- Checking profile information
- PST, resource monitoring, and mode settings for PST
- Configuration of fcache, bcache, ratelimit of KUSANAGI
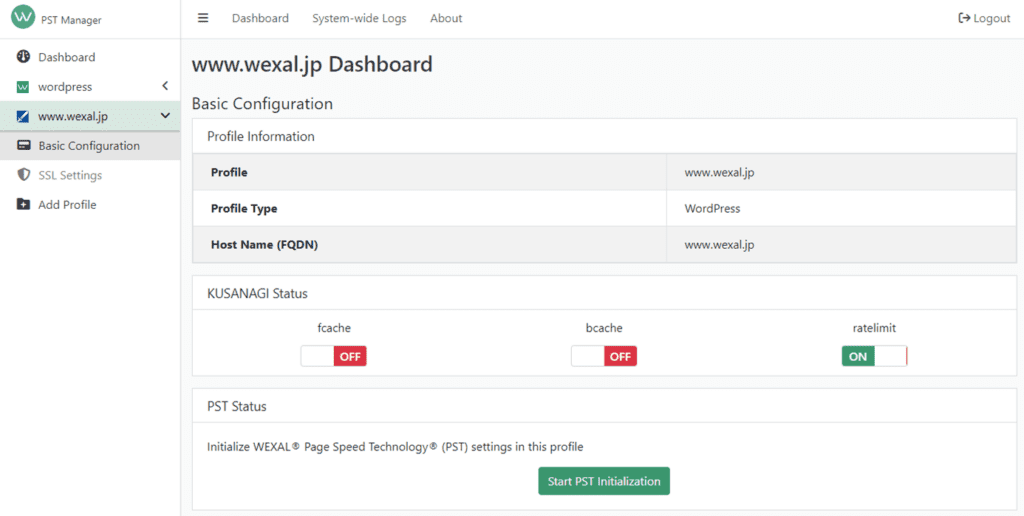
For profiles without PST initialization, the following operations can be done on the selected profile.
- Checking profile information
- Configuration of fcache, bcache, ratelimit of KUSANAGI
- Start PST initialization
Resource Optimization (pane menu)
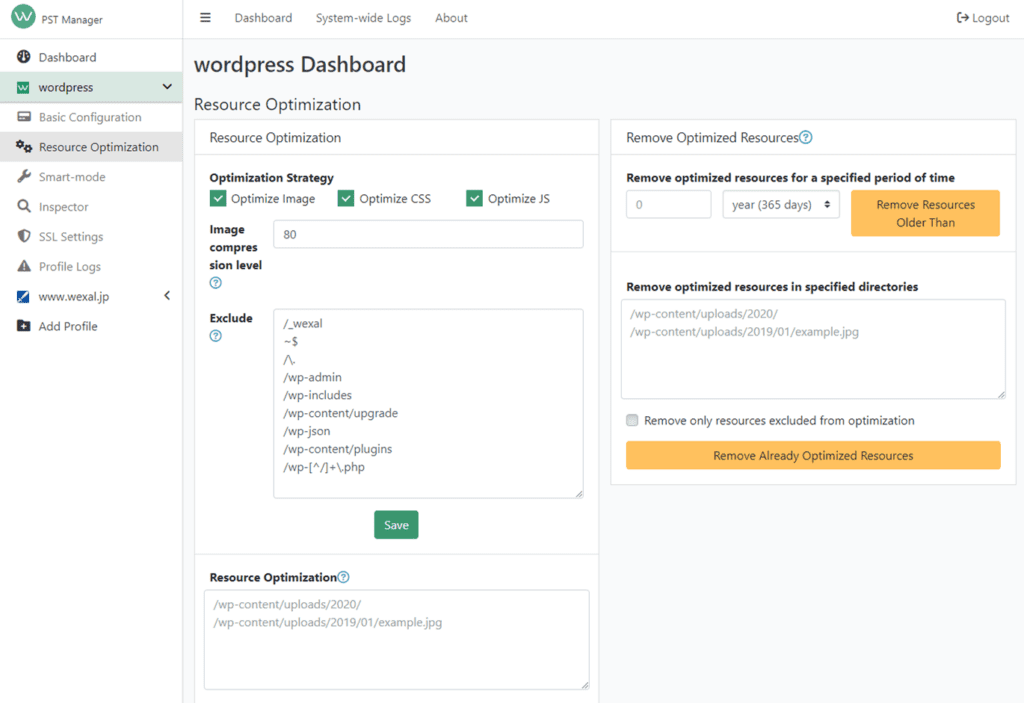
The following operations can be done on the selected profile.
- Advanced resource optimization settings
- Resource optimization
- Removing optimized resources
Smart-mode (pane menu)
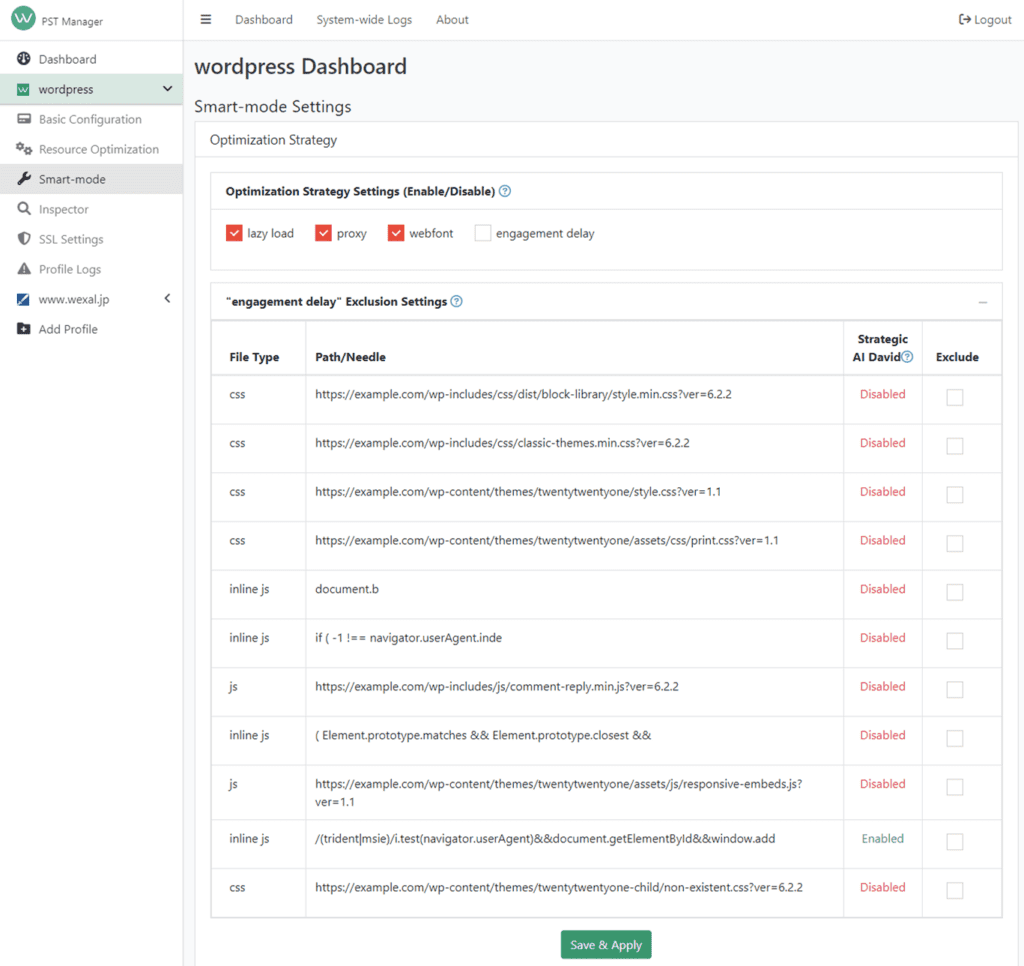
The following advanced settings can be configured on the selected profile.
- Optimization Strategy (Enable/Disable)
- Exclusion settings for "engagement delay"
Expert-mode (pane menu)
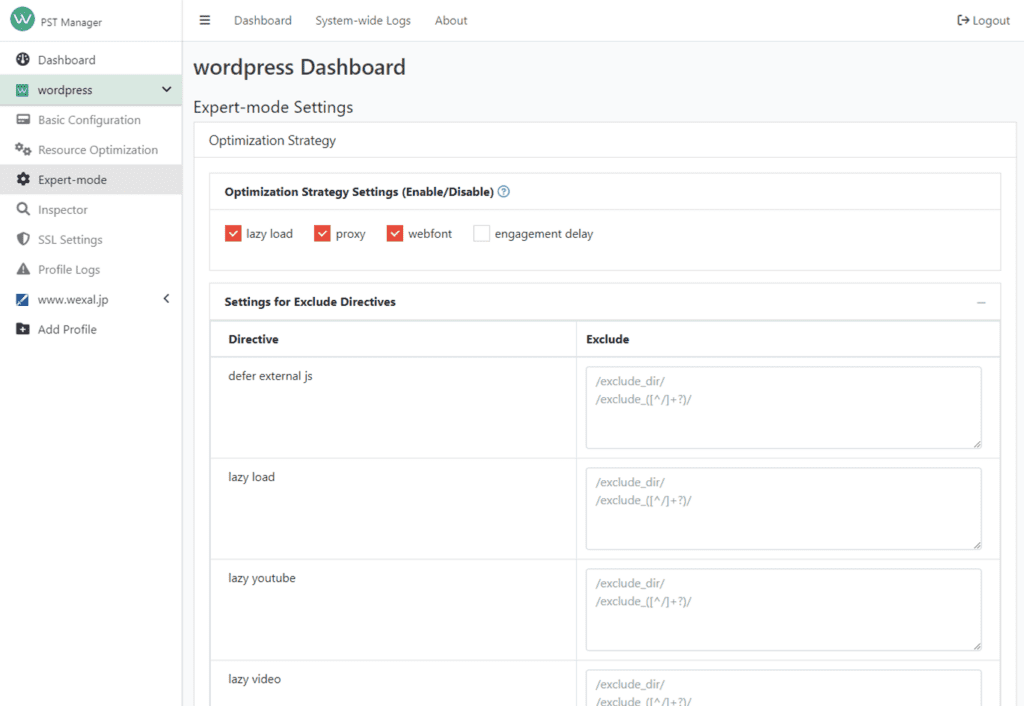
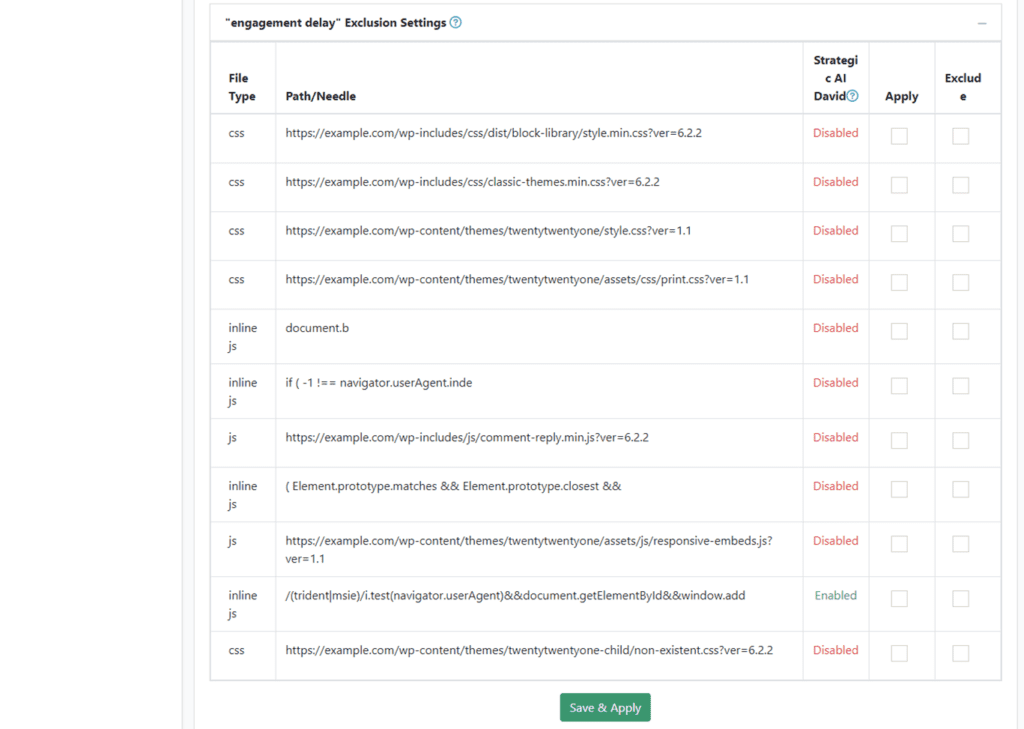
The following advanced settings can be configured on the selected profile.
- Optimization Strategy (Enable/Disable)
- Settings for Exclude Directives
- Exclusion settings for "engagement delay"
Inspector (pane menu)
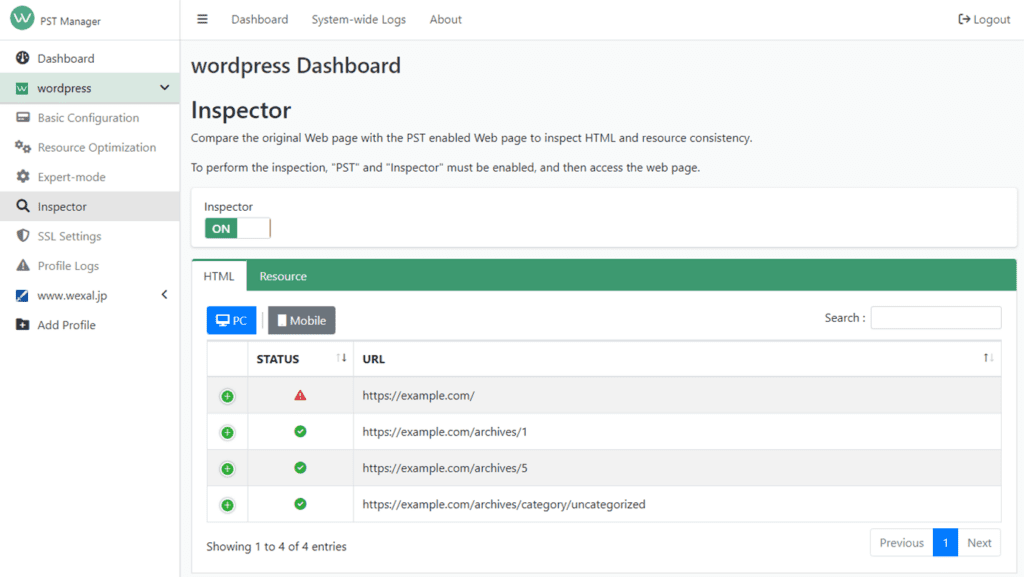
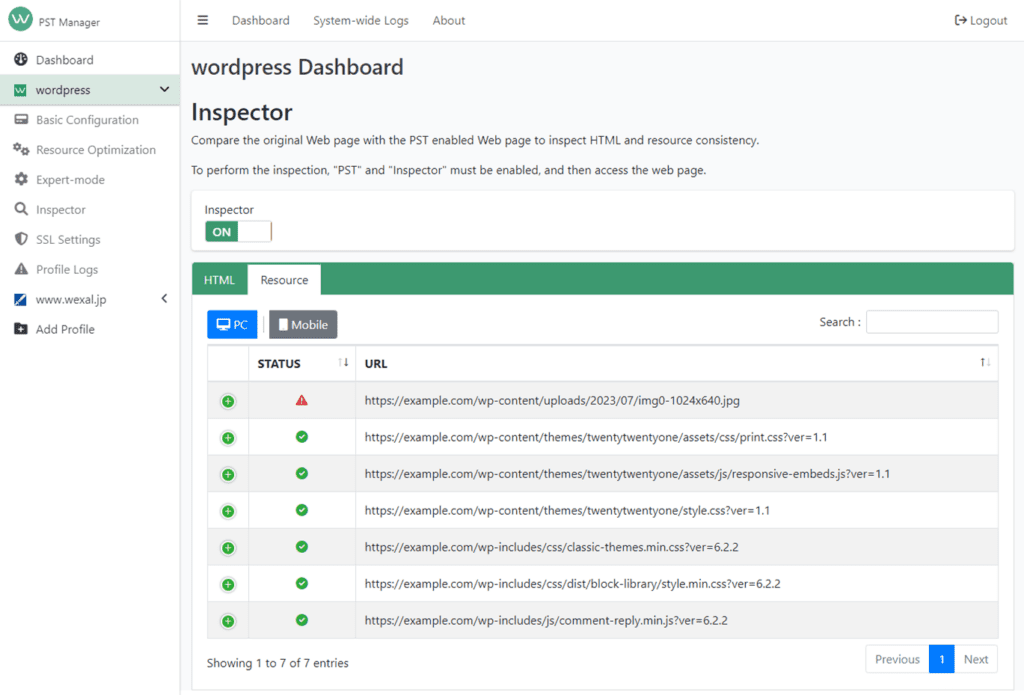
The following operations can be done on the selected profile.
- Settings for Inspector
- Inspect HTML consistency
- Inspect Resource consistentcy
SSL Settings (pane menu)
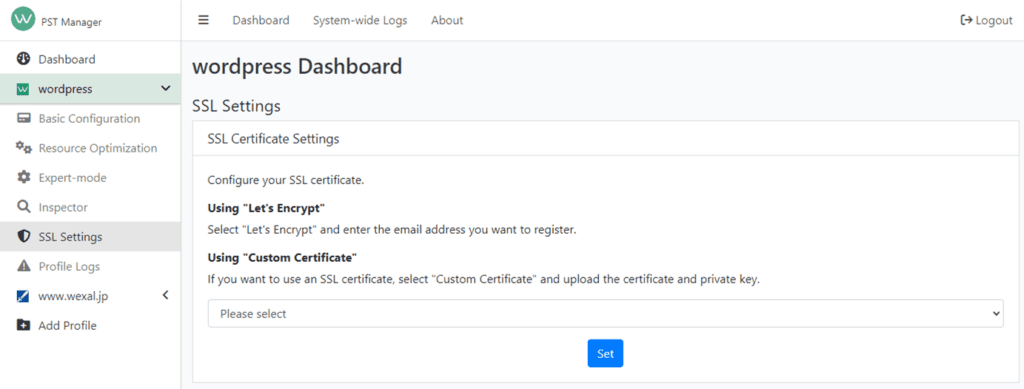
The following configurations for SSL certificates can be done on the selected profile.
- Use Let's Encrypt
- Use custom certificate
Log (pane menu)
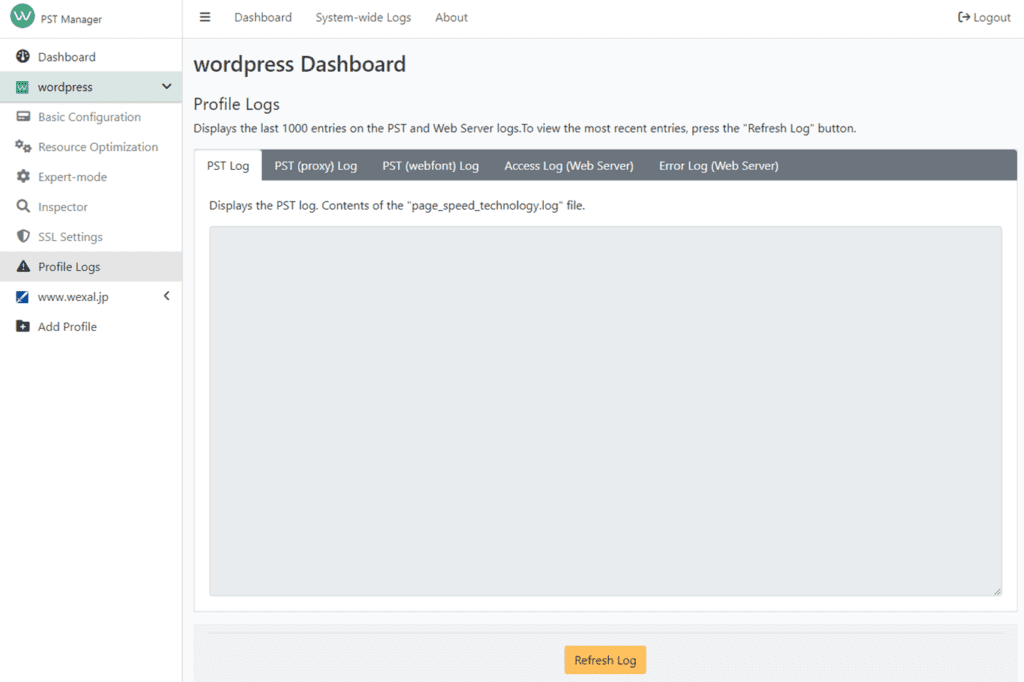
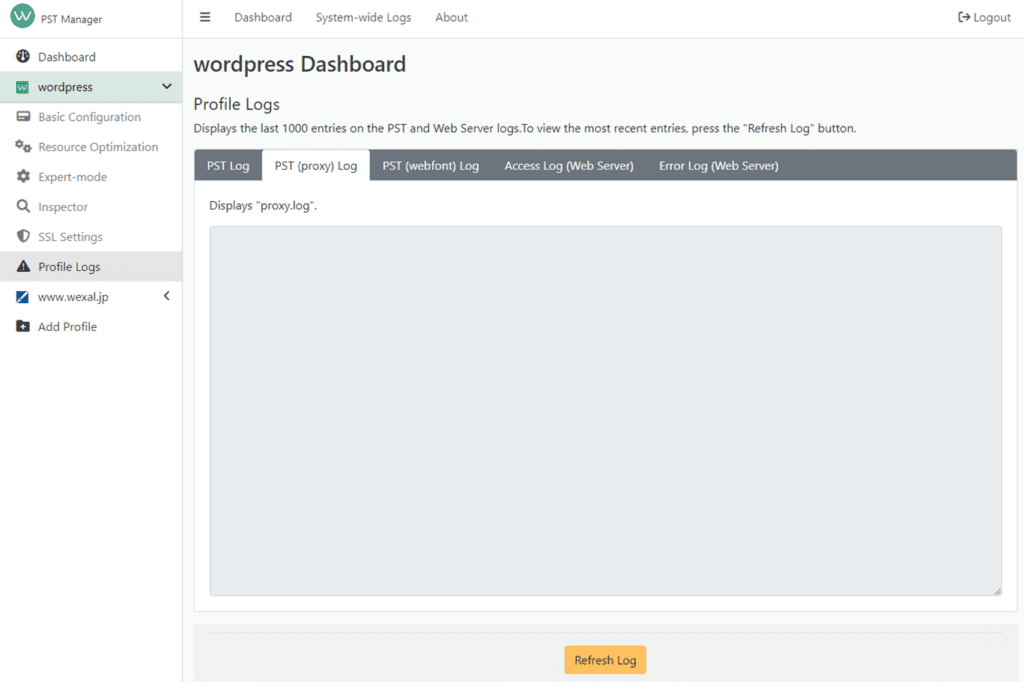
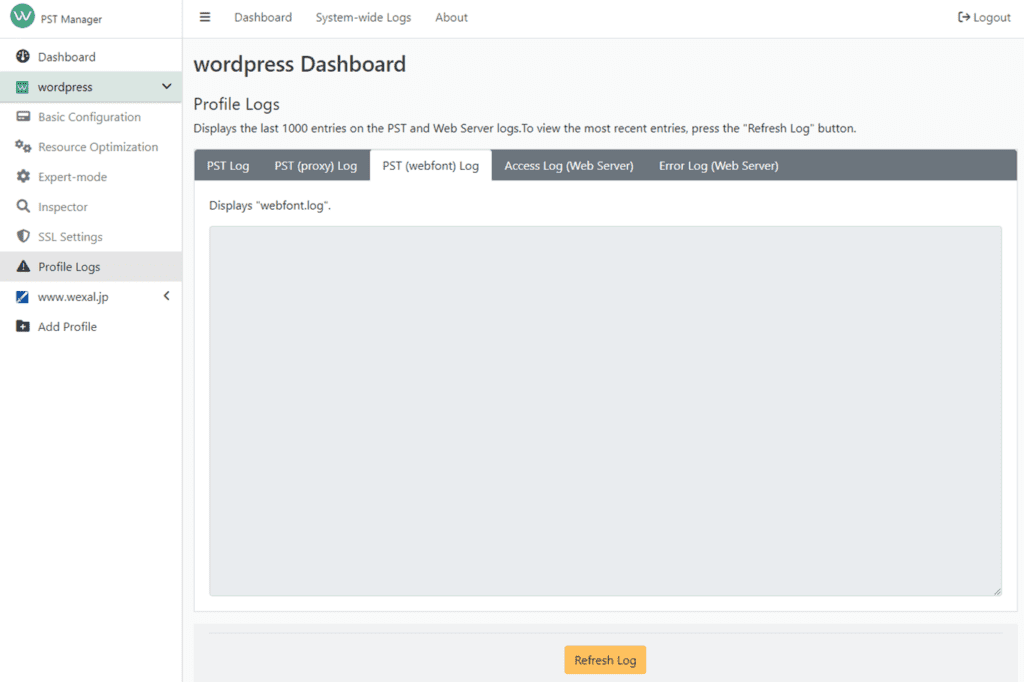
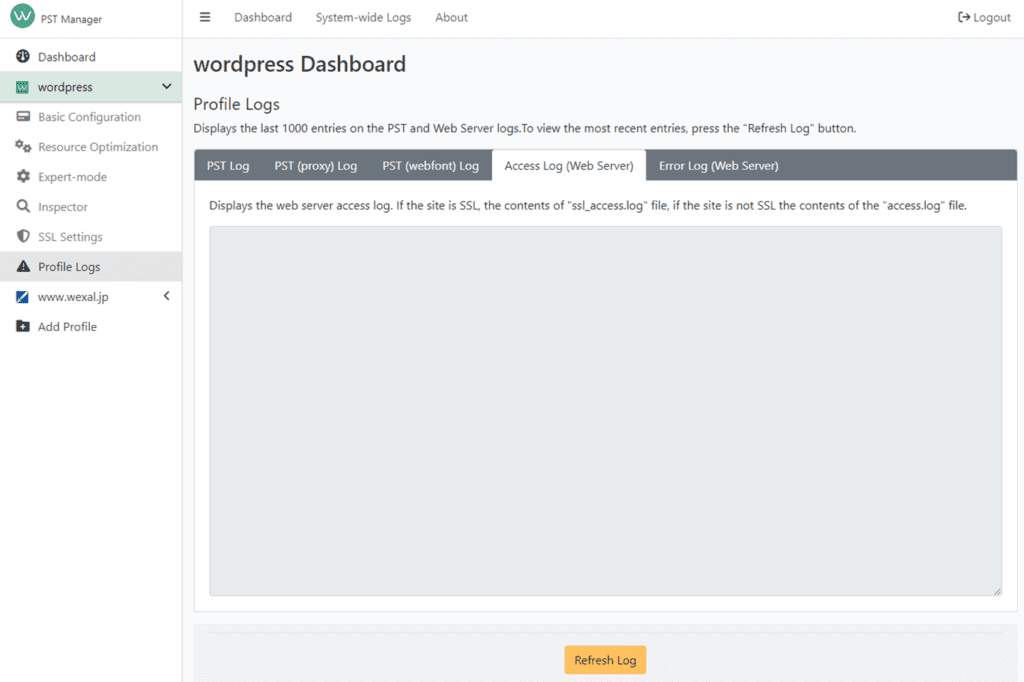
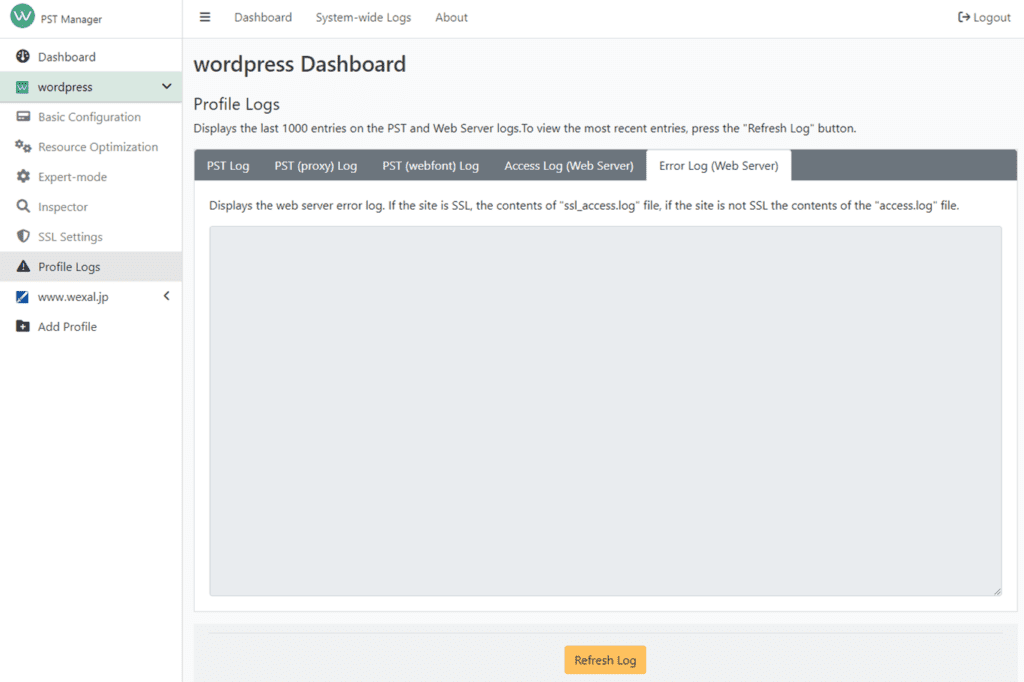
You can check PST system logs in the selected profile.
- PST Log (/home/kusanagi/[profile]/log/pst/page_speed_technology.log)
- PST (proxy) Log (/home/kusanagi/[profile]/log/pst/proxy.log)
- PST (webfont) Log (/home/kusanagi/[profile]/log/pst/webfont.log)
- Access Log (WEB Server) (/home/kusanagi/[profile]/log/[WebServer]/(ssl_)access.log)
- Error Log (WEB Server) (/home/kusanagi/[profile]/log/[WebServer]/(ssl_)error.log)
Add Profile
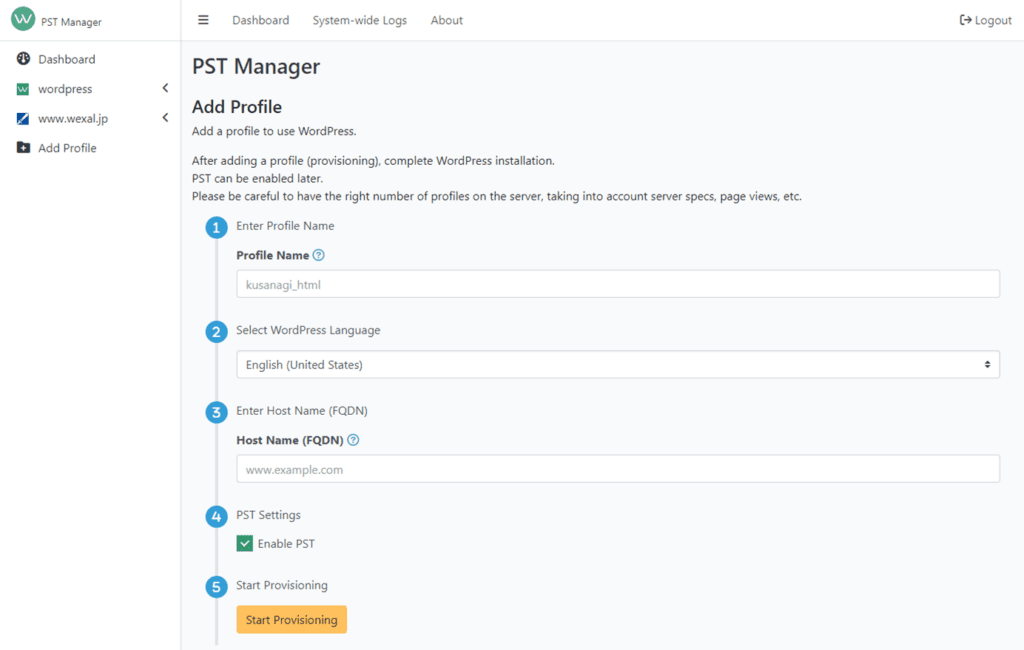
New WordPress profiles can be added.
Getting Started with PST Manager
Basic Configuration for PST
Profile Information
The profile, profile type, and host name (FQDN) can be confirmed from the profile information in the Basic Configuration pane for each profile.

PST Status
For profiles where PST is initialized, PST is controlled by two switches and modes in the PST status.

PST
This switch controls ON/OFF for PST. When set to OFF, settings made in PST Manager will not be active.
Resource Monitoring
This switch controls ON/OFF for PST Resource Monitoring Service ("watch"). This service monitors the selected profile in real time, and directs optimization strategies according to resource changes. Refer to "Document: (watch)" for more information.
Mode
Select from Smart-mode, Expert-mode, or Developer-mode.
Start PST Initialization
For profiles that have not yet completed PST initialization, you can start initialization by clicking the "Start PST Initialization" button.

KUSANAGI Status
KUSANAGI features are controlled by three switches in the KUSANAGI status.

fcache
This switch controls ON/OFF for fcache.
bcache
This switch controls ON/OFF for bcache. Bcache cannot be used for profiles other than WordPress.
ratelimit
This switch controls ON/OFF for DoS attack countermeasure.
Resource Optimization Settings
Optimization Settings
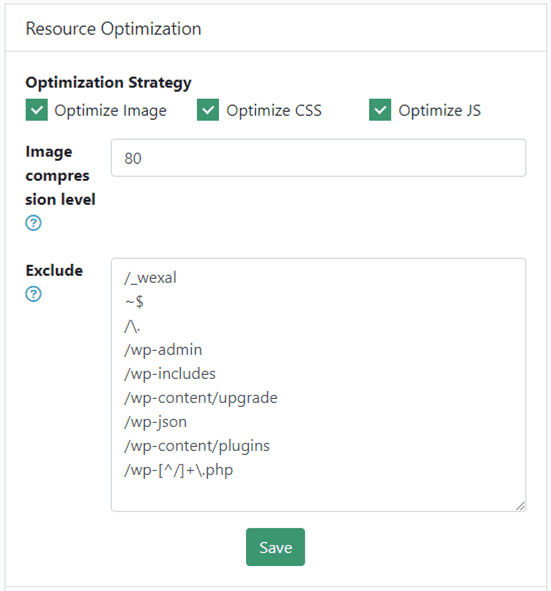
These settings allow you to change the types and paths of resources you want to exclude from resource optimization, as well as the compression level of images.
In the "Optimization Strategy", enable/disable the three checkboxes for images, CSS, and JS by checking ON/OFF. For the "Image Compression Level", you can set a value from 1 to 100. The lower the value, the more compressed the image and smaller the file size, but the quality of the image will be lower. Under "Exclude", you can specify directories to be excluded from PST optimization, please set the absolute path from the DocumentRoot of the profile. When you change the settings, click the "Save" button to save the configuration.
Resource Optimization
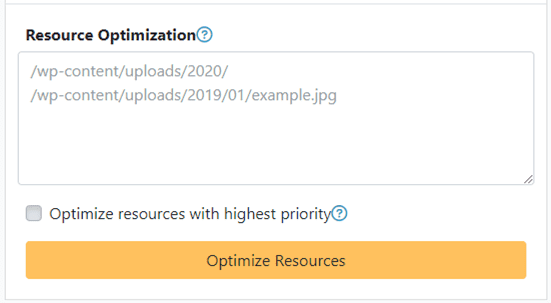
Resource optimization is performed for all resources based on the "Resource Optimization" settings above. Note, if you want to optimize a specific resource on a priority basis, click ON for "Optimize resources with highest priority", specify the path to the folder or file, and execute "Optimize Resources".
Removing Optimized Resources
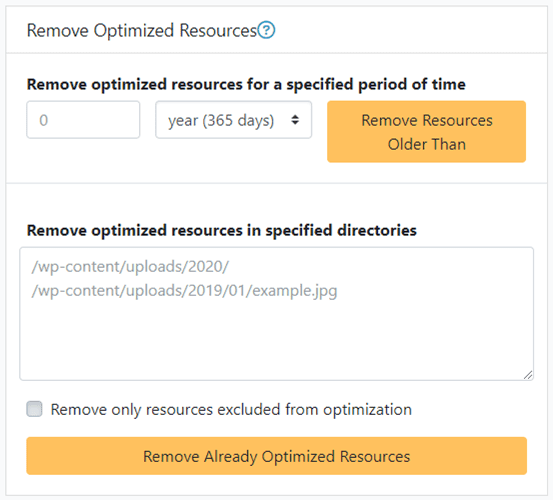
These settings allow you specify a period of time and optimized resources, and remove them.
Removing Optimized Resources by Specifying a Time Period
Specify the year, month, day, hour, and minute. Remove optimized resources older than the specified period by clicking the "Remove Resources Older Than " button. The creation date of the optimized resource is the same as the creation date of the original resource.
Removing Optimized Resources by Specifying the Resources
Enter the path to the folder or file you want to remove and click "Remove Already Optimized Resources". Note, if you want to remove only the resources excluded from optimization, click ON for "Remove only resources excluded from optimization", and then execute "Remove Already Optimized Resources".
Detailed Configuration for Optimization Strategy
Disable Optimization Strategy

In Smart and Expert modes, you can set features to be disabled in the optimization strategy. Check the features you wish to disable and execute "Save and Apply" at the bottom of the pane.
- lazy load: delays the loading of images contained in the content.
- proxy: enable PST optimization for external resources (img, css, js) by proxying them locally.
- webfont: split webfonts in the stylesheets and delay loading webfonts.
- engagement delay: delay the closure of scripts included in the content, as well as the execution of scripts and the loading of stylesheets, depending on the website visitor's engagement with the site.
Exclusion Settings for Directives
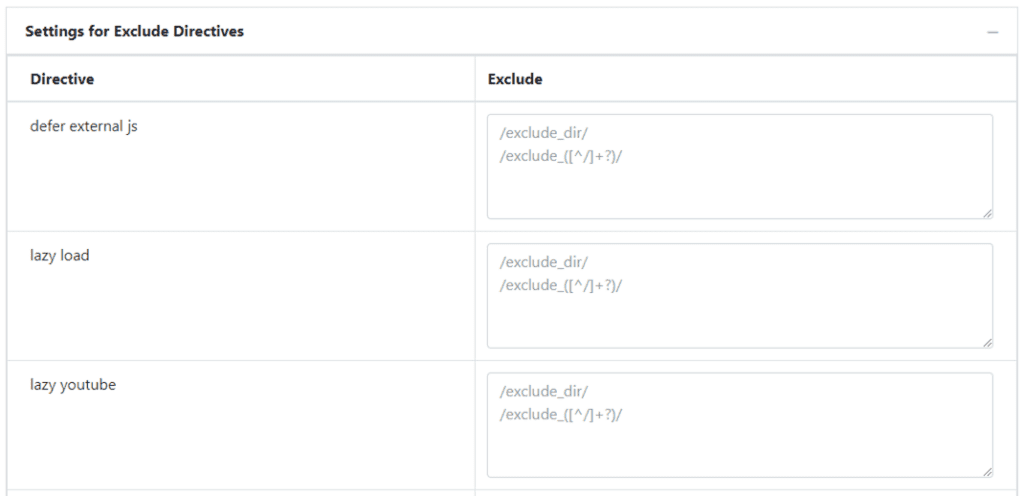
In expert mode, you can set directives to be disabled in the optimization strategy for each URL. Enter the URLs to be excluded in regular expressions for the directives you wish to disable, then execute "Save & Apply" at the bottom of the pane.
Exclusion Settings for "engagement delay"
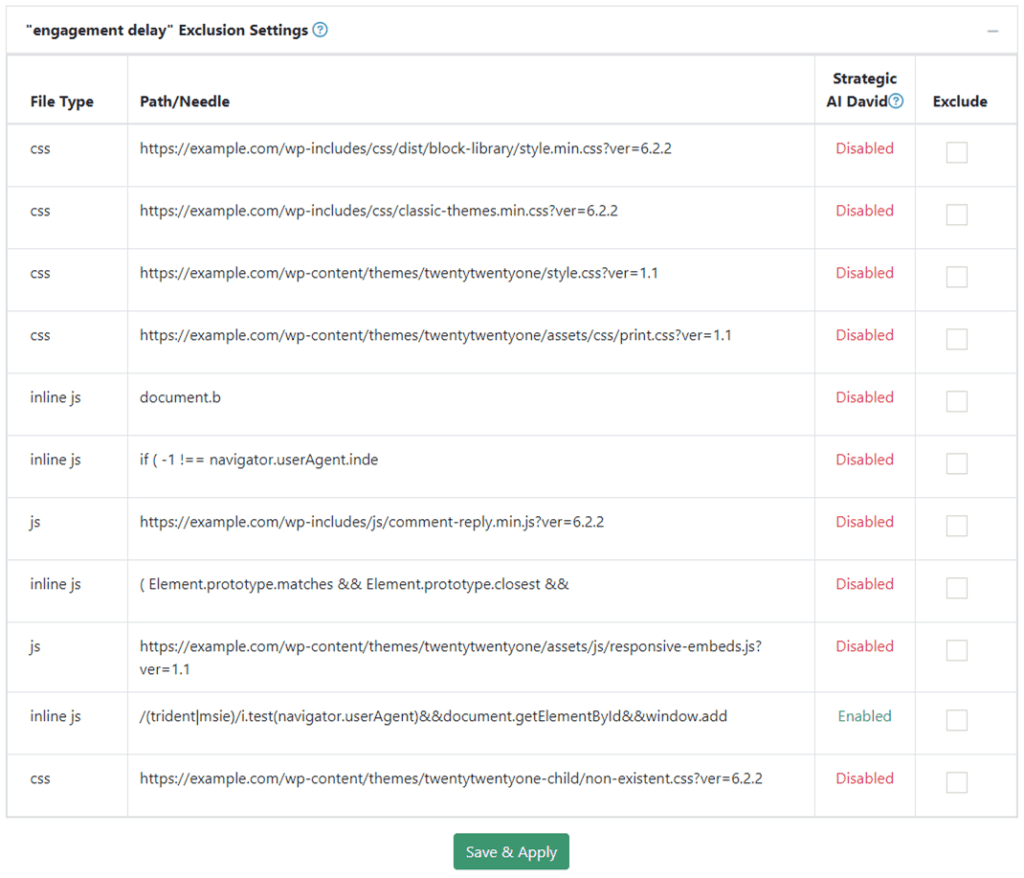
Strategy AI David automatically determines which scripts to apply "engagement delay" in the optimization strategy. Those scripts that AI determines do not apply the delay are marked as "Disabled" and those scripts that do apply the delay are marked as "Enabled".
In Smart-mode, you can disable "engagement delay" by excluding those scripts that the AI determines to apply the delay. Check "Exclude" the ones you want to disable and execute "Save and Apply" at the bottom of the pane.
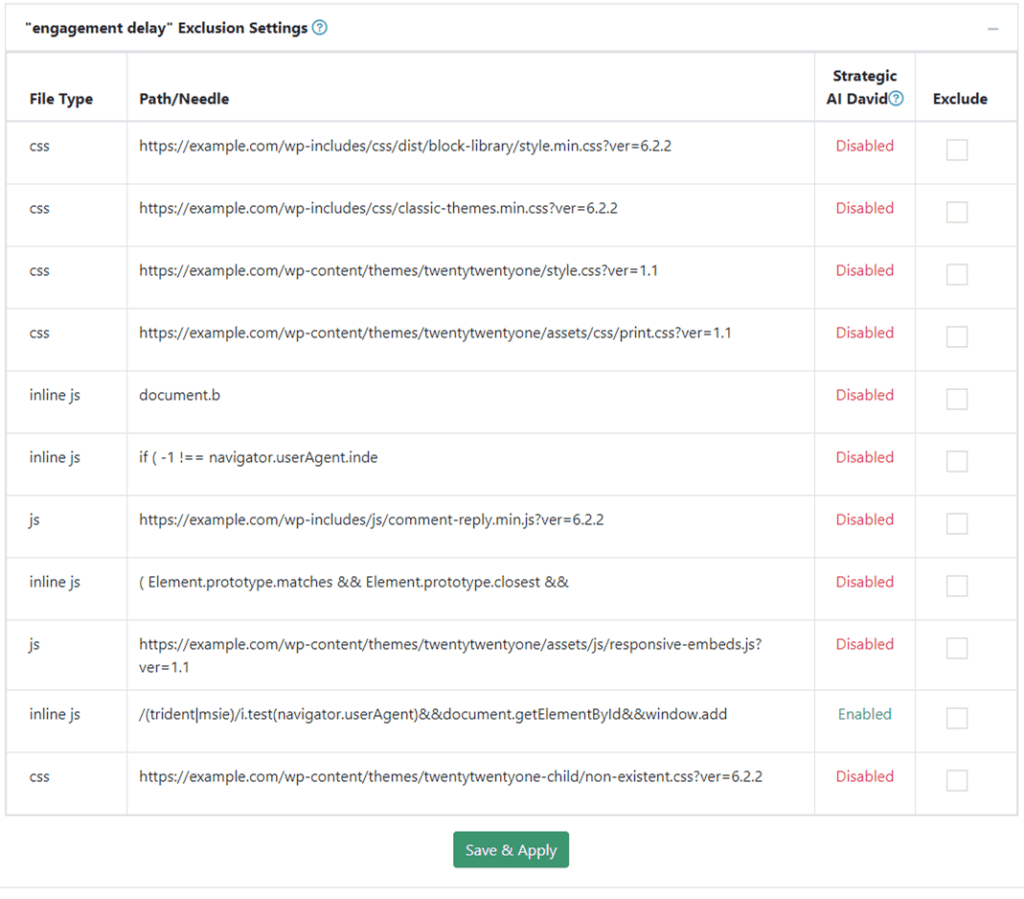
In addition to Smart-mode, Expert-mode allows you to enable "engagement delay" by applying them to those scripts that the AI determines not to apply the delay. Check "Apply" for the ones you want to enable and execute "Save and Apply" at the bottom of the pane.
Inspect PST Consistency

This switch controls ON/OFF of the inspector function. When PST is set to ON and the inspector is set to ON, the original Web page and the PST-enabled results are compared at the access to the Web page to inspect HTML and resource consistency. When the inspector is turned OFF, it does not newly compare the original Web page and the PST-enabled results, but you can refer to the results that have already been inspected.
Inspect HTML Consistency
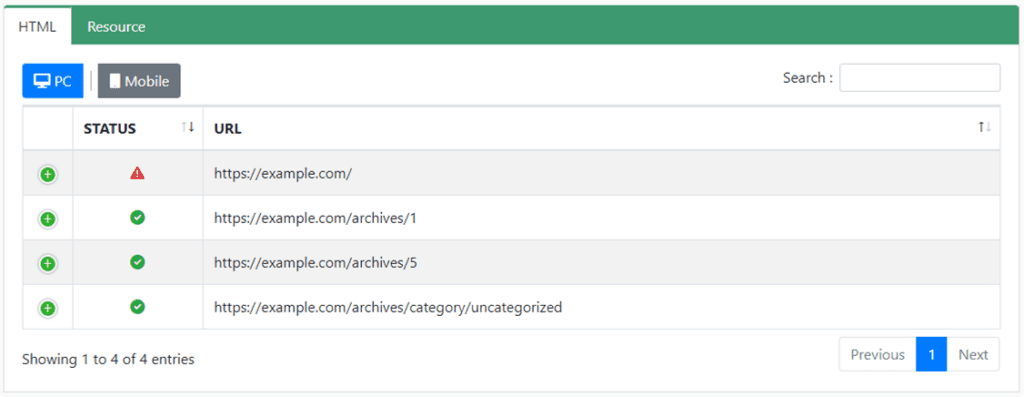
The list of URLs for which the optimization strategy was generated with PST turned on is shown. Inspection is done separately for PC web pages and mobile web pages.
If results are not shown, PST is set to OFF or the web page is not accessed yet. You need to set PST to ON and then access the web page.
The results of the inspection can be seen by expanding the toggle at the beginning of each line.
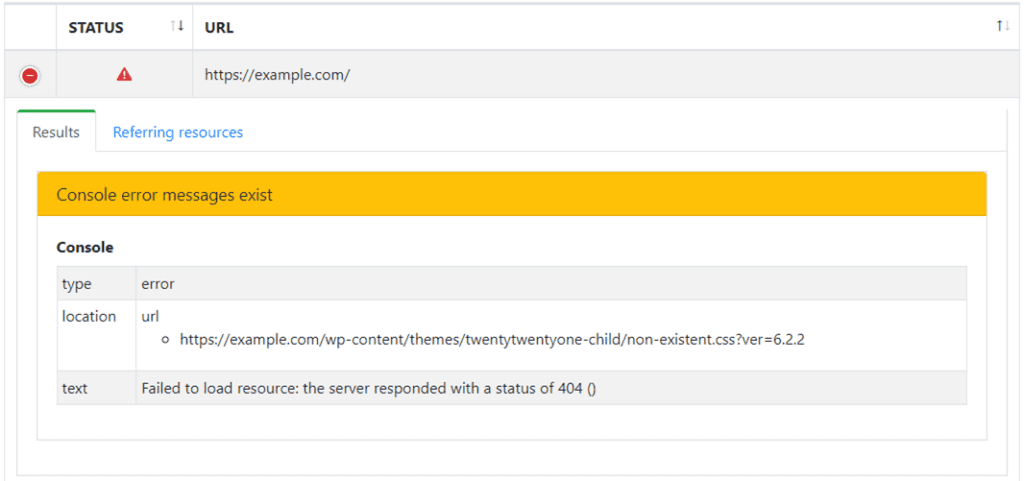
The contents are shown in the "Results" tab.
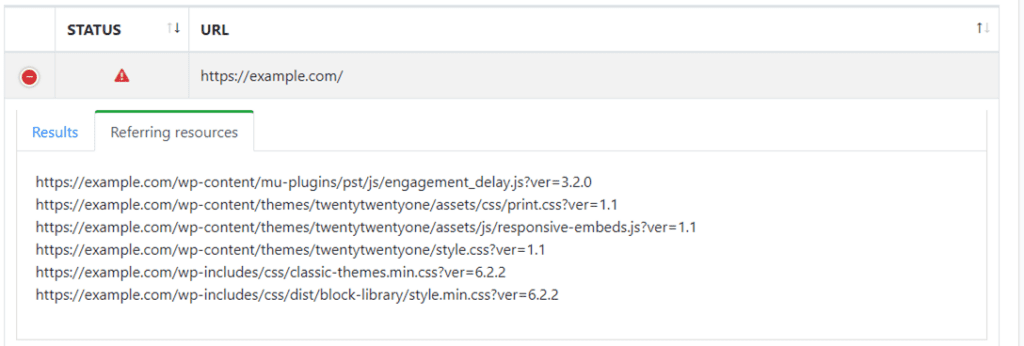
The "Referenced resources" tab shows the list of URLs of resources that the web page refers to.
Inspect Resource Consistency
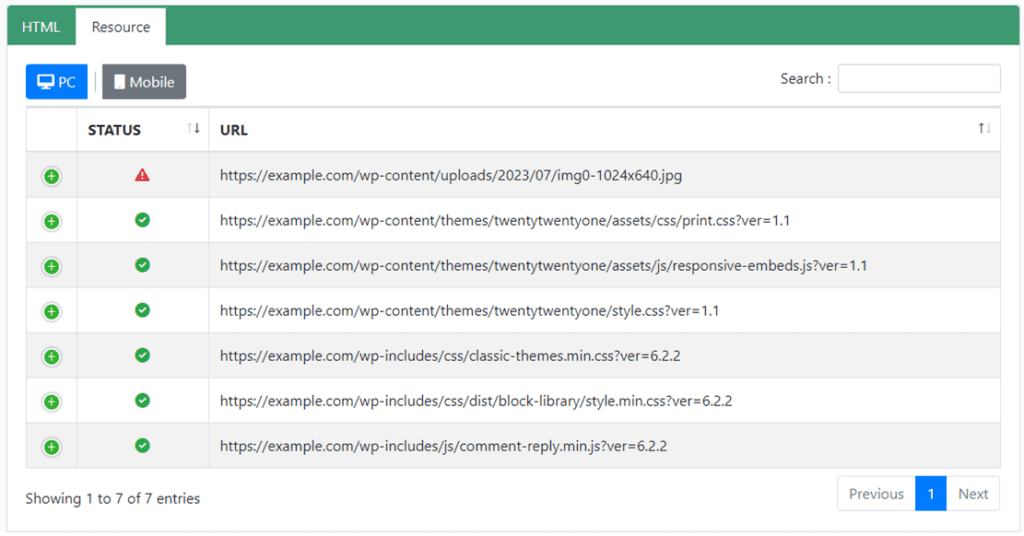
The list of resource URLs referred with PST turned on is shown. Inspection is done separately for PC web pages and mobile web pages.
If results are not shown, PST is set to OFF or the web page is not accessed yet. You need to set PST to ON and then access the web page.
The results of the inspection can be seen by expanding the toggle at the beginning of each line.
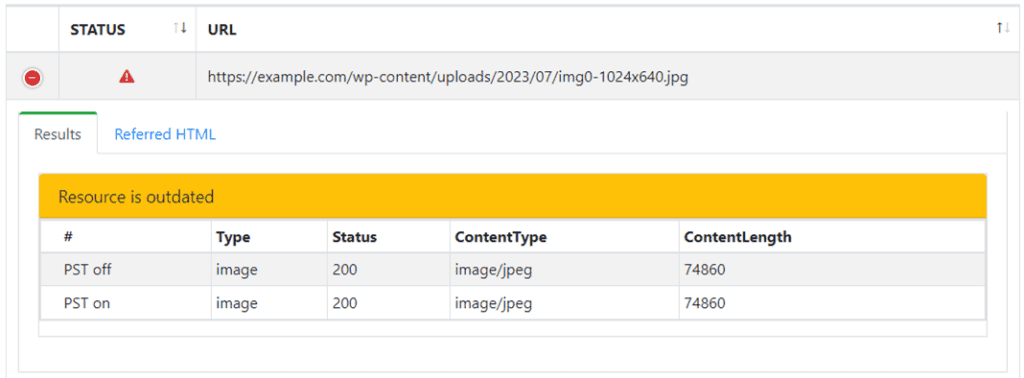
The contents are shown in the "Results" tab.

The "Referred HTML" tab lists the URLs of the web pages from which the resource is referred.
Configuration for SSL Certificates
SSL certificates for each profile can be configured and changed from PST Manager.
Useing Let's Encrypt
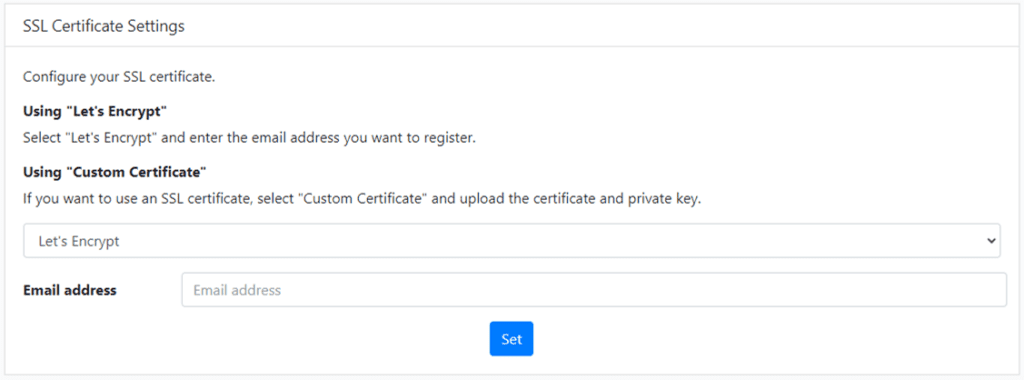
If you wish to use Let's Encrypt, enter the e-mail address you wish to register and execute the "Set" button.
Using Custom Certificates
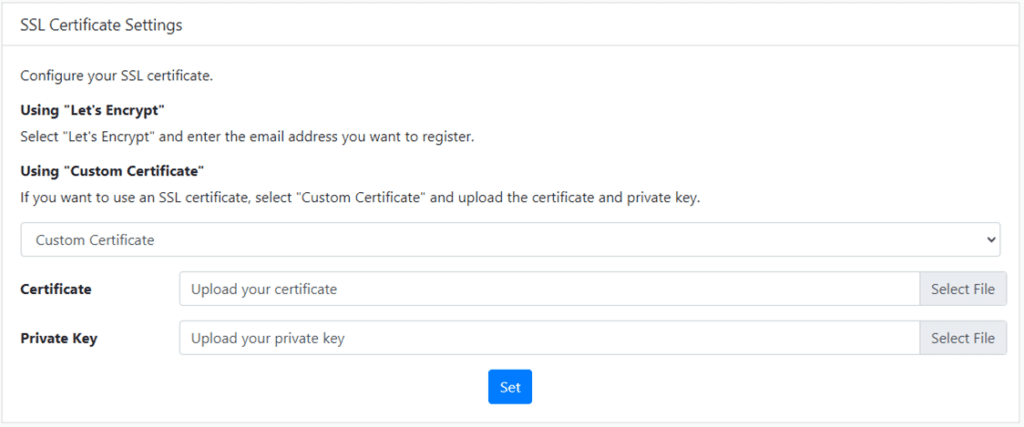
To use a custom certificate, select the certificate file and private key file respectively and execute the "Set" button.
Add Profile
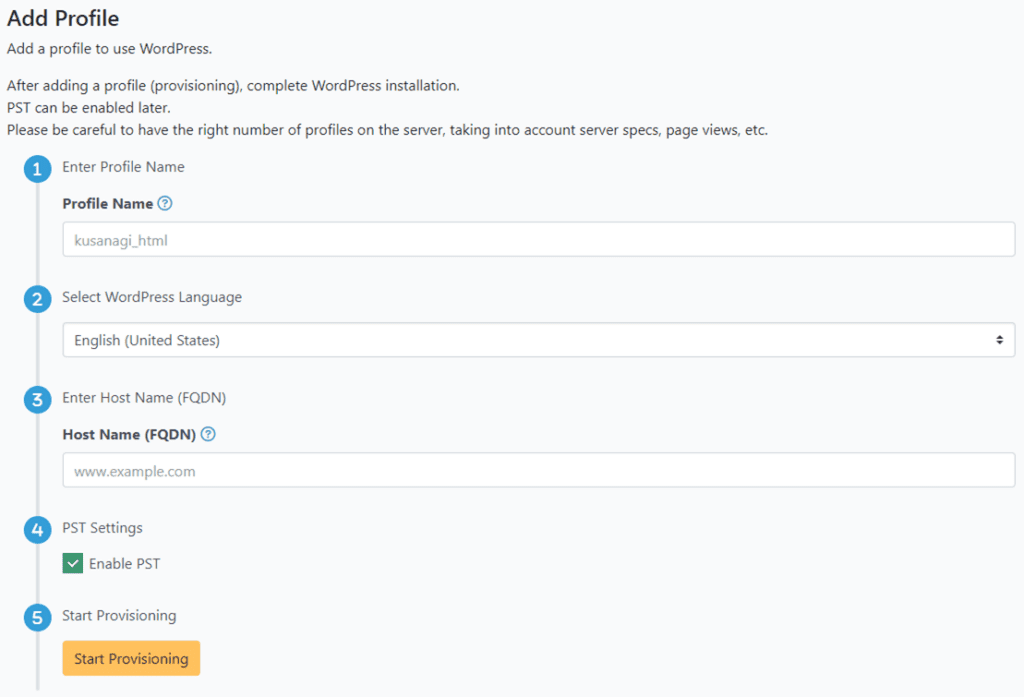
You can add a profile to use WordPress from PST Manager. To add a profile, enter the following information and execute "Start Provisioning".
- Profile name
- WordPress language
- Host name (FQDN)
- Enable PST
Note that if you want to add a non-WordPress profile, please login to the server via SSH connection and execute the KUSANAGI command.
PST Manager FAQ
I changed the image compression level [quality], do I need to execute optimization again?
Yes, you need to execute "Optimize Resources" again.
When you change the image compression level in the resource optimization settings, you need to re-optimize the existing optimized resources. First, specify the directory (enter slash / if all) in the "Remove optimized resources by specifying resources", and execute by clicking the "Remove Optimized Resources" button. Then, specify the directory (enter slash / if all) in "Resource Optimization" and execute by clicking the "Optimize Resources" button.
Refer to "worker" Directive for more information.
I changed the "exclude" optimization settings, do I need to execute optimization again?
No, it is not necessary to execute "Optimize Resources" again, but you do need to execute "Remove Optimized Resources".
When you change the "exclude" setting for images, CSS, and JavaScript in the resource optimization settings, save the settings at first, then specify the directory (enter slash / if all) in the "Remove optimized resources by specifying resources", check ON for "Remove only the resources excluded from optimization", and execute by clicking the "Remove Optimized Resources" button.
Refer to "worker" Directive for more information.
I want to manually create a PST configuration file.
Select Developer-mode, check the "PST Configuration File"and manually create and edit the configuration file (pst.config.yaml).
